Installation
To get started with Vy, follow these steps:
- Download the latest version of Vy from the home page.
- Run the installer for your operating system (Windows, macOS, or Linux).
- Follow the installation wizard instructions.
- Launch Vy after installation completes.
Installing Mac App
1: Go to Vercept.com and Click Download
2: Open the Vy App
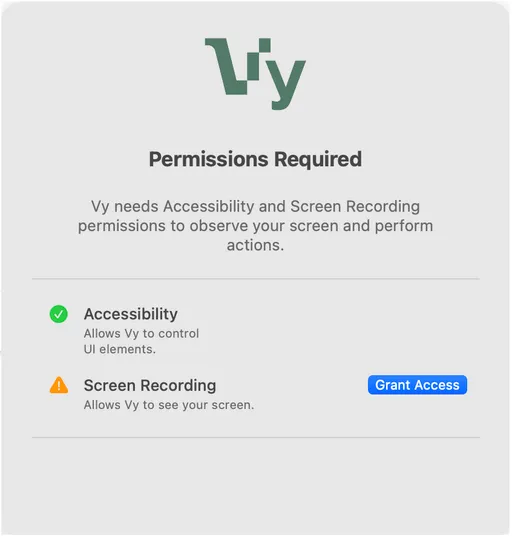
You should get a “Permissions Required” pop-up as seen below:
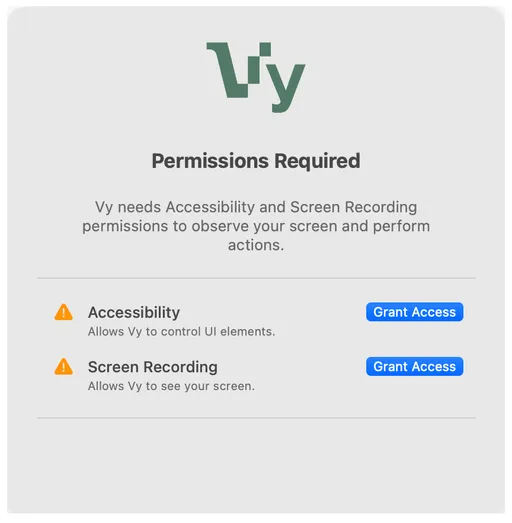
3: Grant Permissions
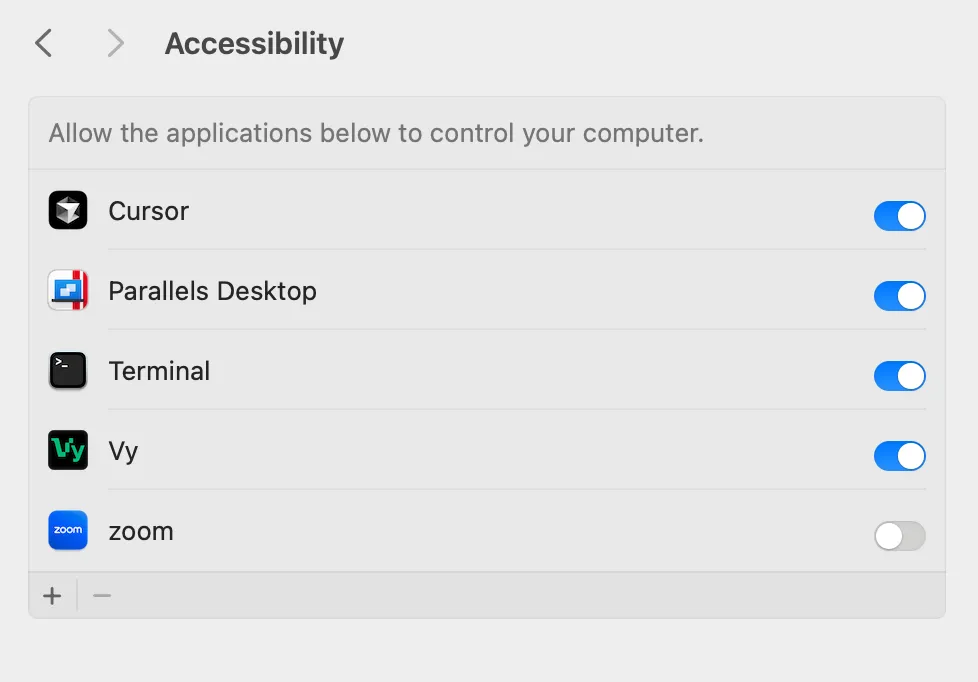
Accessibility
Click on “Grant Access” for Accessibility
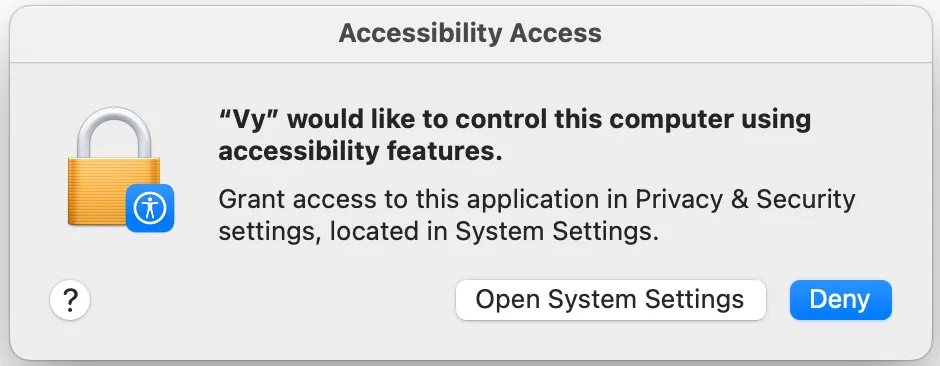
Toggle on the permission for the Vy App
Screen Recording
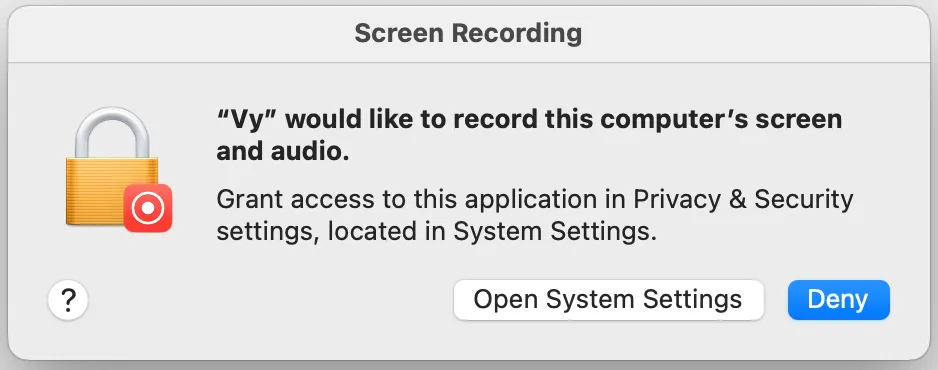
Click on “Grant Access” for Screen Recording on the Vy App
Click on “Open System Settings”
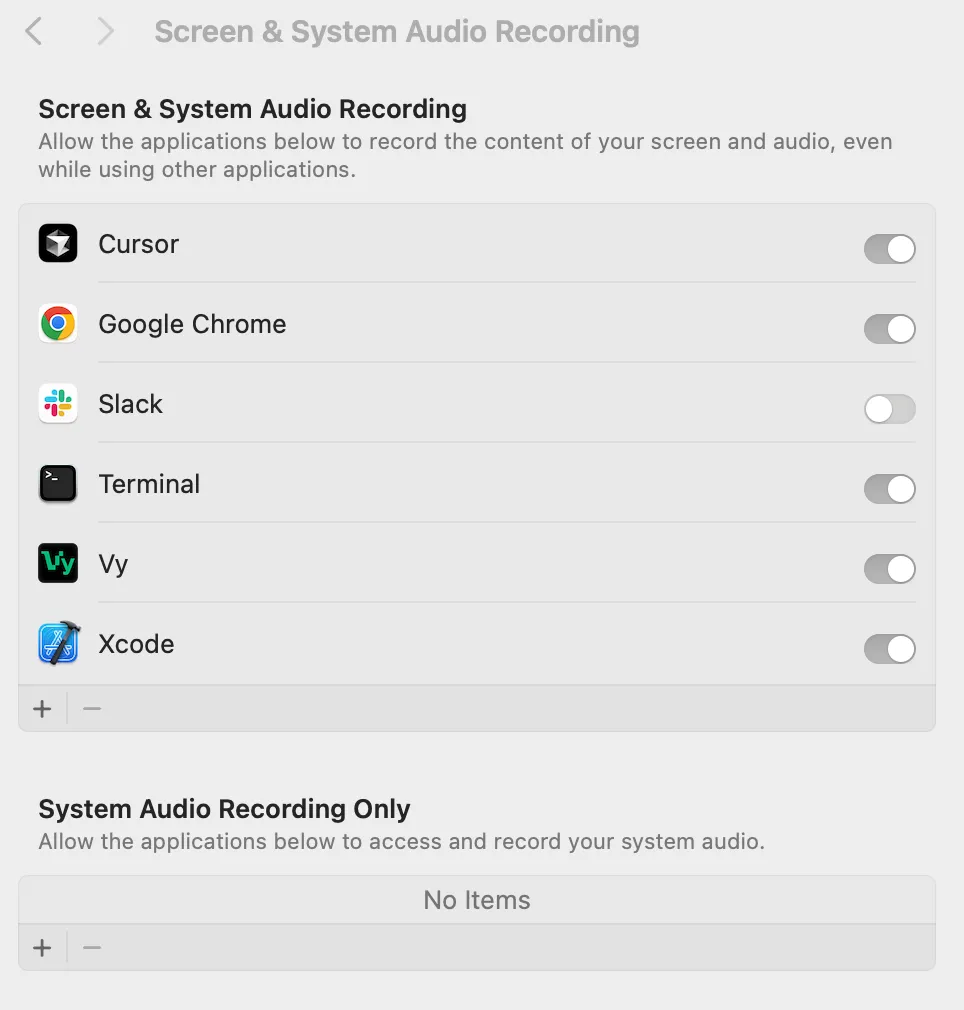
Toggle on the permission for the Vy App
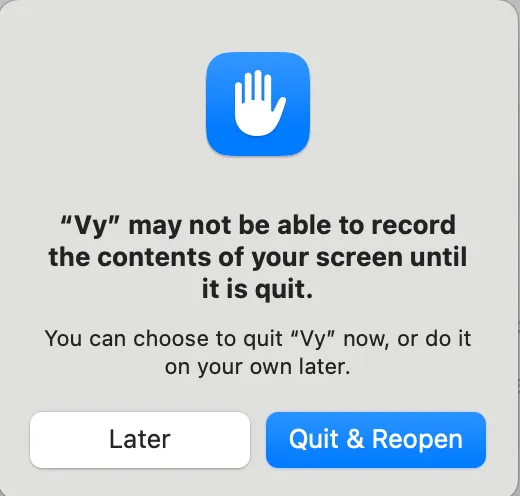
Quit and Reopen the App
To update the permissions, please quit and relaunch the app. You may see a prompt like the one shown below—but even if you don't, it's important to complete this step.
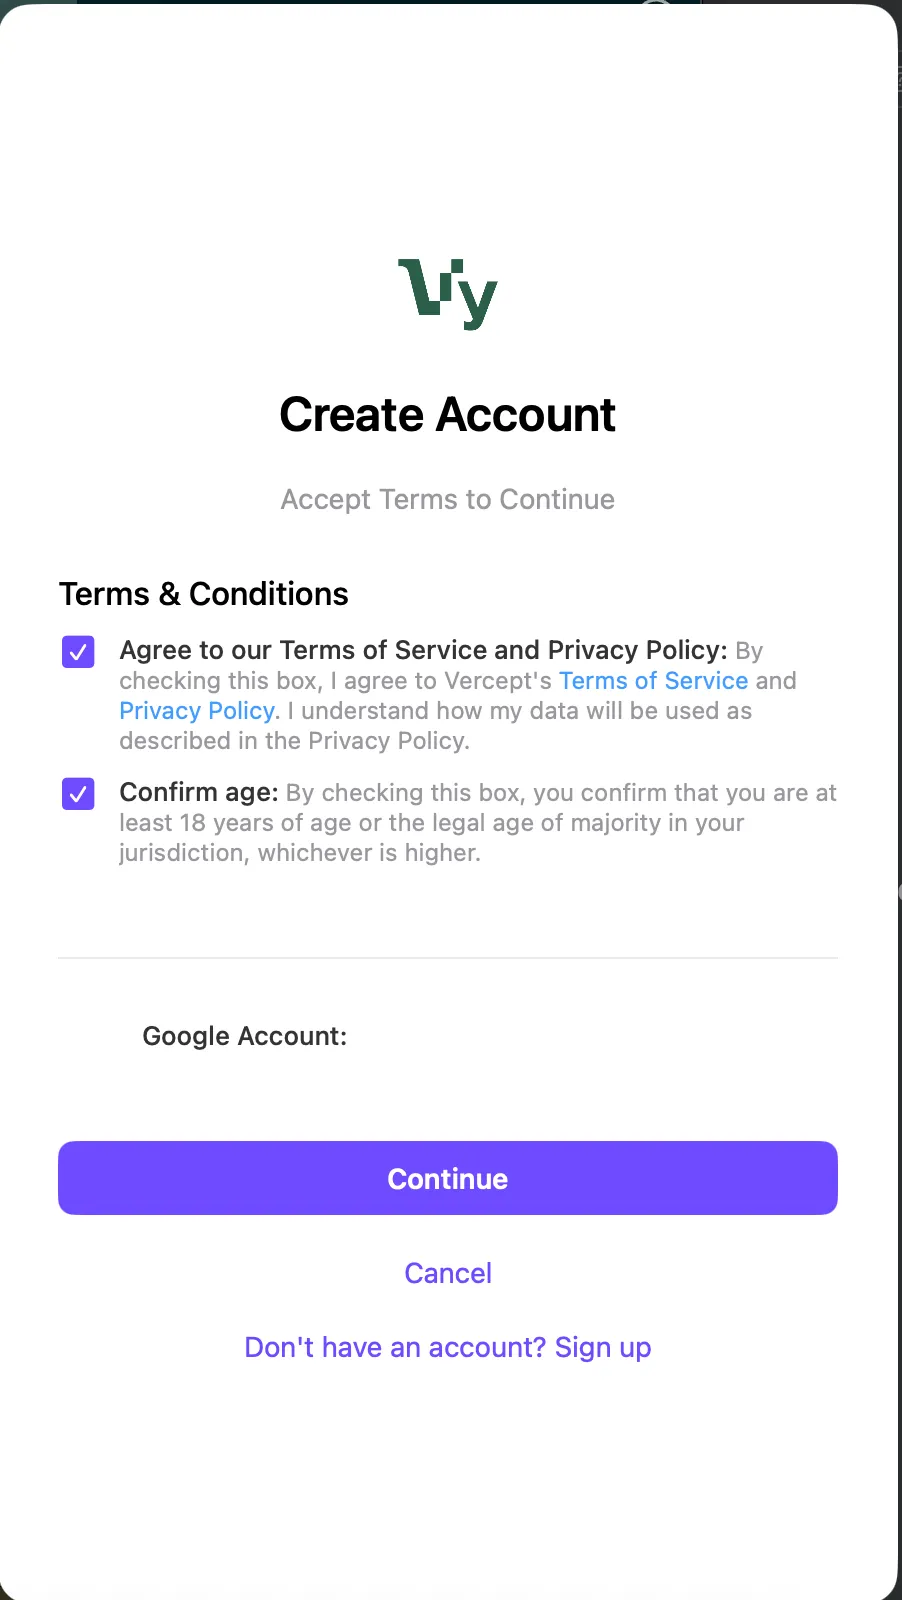
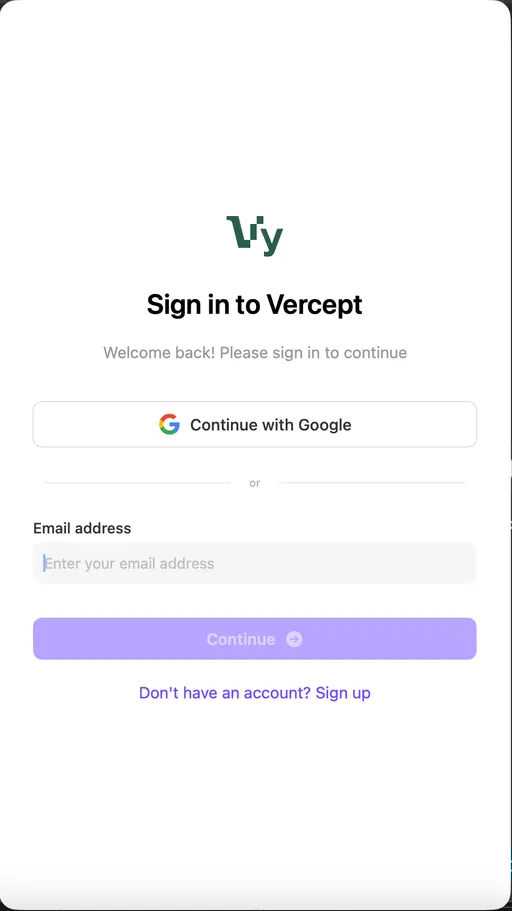
4: Login
Create an account or login
Agree to the Terms and Conditions